Can’t concentrate on your work due to unbearable shoulder pain?
If you struggle with regular shoulders pain or stiff and tense neck, don’t worry, you’re not alone.
In this hectic modern lifestyle, it is not rare to see even young adults complaining about the problems like neck and shoulder pain.
Yoga can definitely help you ease out your shoulder pain if you do the poses correctly. But do you know what are the best yoga poses for shoulder pain?
Before we move on to the stretches for neck and shoulder pain, you must have a look at the primary causes of shoulder pain.
These causes develop pain in your neck and then it extends to shoulder and then back. Sometimes neck pain can also lead to headaches.
Sitting in the same position for a long time while working on your computer can result in severe shoulder pain. This is the reason why it is always recommended to take short breaks while working on your PC.
2 – Wrong posture of sleeping:
Sleeping posture is also important to maintain good health. An improper posture of sleeping can put stress on your shoulder resulting in shoulder pain.
To remain fit and active, you should do some kind of physical exercise likes walking, jogging, cycling, etc for at least 30 minutes a day.
Not doing so can also result in health problems including constant shoulder pain.
9 Simple Stretches for Neck and Shoulder Pain
Yoga is always a smarter and natural option to fix your shoulder pain as compared to painkillers and ointments. Here are the 9 effective yoga poses and stretches for neck and shoulder pain.
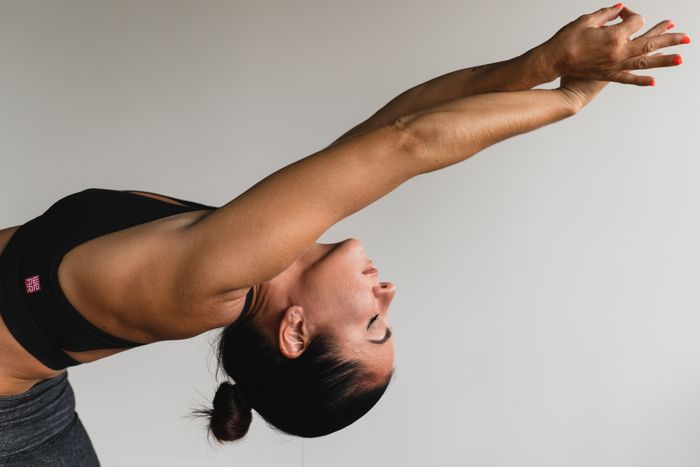
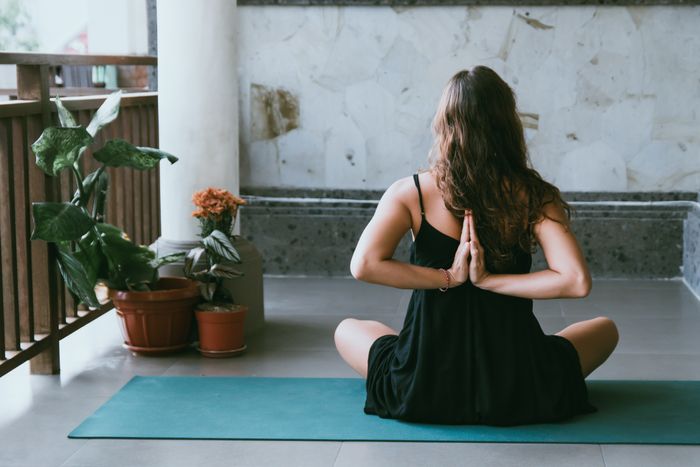
1. Parvatasana (Mountain Pose)
The first pose is quite simple, just follow the steps mentioned below carefully.
Sit with your legs crossed (Sukhasan).
Join the palm of your hands and stretch your arms up.
Now, you will feel stretches in your shoulder, arms and back.
Keep this pose for 1-2 minutes and slowly get back to the initial position.
The wide-legged forward bend pose can have a calming effect on the nervous system. This is one of the best and effective stretches for neck and shoulder pain relief quickly.
Step two feet about three and a half or four feet away from each other.
Point your feet to parallel with toes facing inwards and heels outwards.
Slowly start to fold forward from the hips and reach the crown of the head down.
From here place your hands touch the ground, fingers pointing forward.
Draw your shoulders away from ears and keep the legs active.
Hold the position firmly anywhere between 30 seconds to 1 minute and try to breathe deeply.
Anyone with high blood pressure problems or severe back problems should avoid this asana.
3. Garudasana (Eagle Pose)
The eagle pose is good for balance and respiratory problems. It tones your thighs, arms, and shoulders.
Stretch your arms forward, and bend your knees.
Put all your weight into the left foot. Cross your right thigh over the left and hoop the right foot behind the calf.
Take your right arm underneath wrap up the elbow and wrist
breath and sit down a bit low to feel the stretch in your hips and shoulder
With an exhalation, unwrap the hands, legs and come up.
Repeat the same other side.
4. Setu Bandhasana (Bridge Pose)
Setu Bandhasana is great to keep a lot of flexibility in your spine and will definitely help you release neck and shoulder pain.
Start with lying down on your back while placing your heels as close as possible to butt.
Hold your ankles with hands and slowly inhale and lift your hip all the way up.
Stay here for a couple of deep breaths.
When you release the posture, exhale and gently put your hips down to the mat.
Relax in savasana.
5. Vajrasana (Thunderbolt Pose)
This asana not only releases your shoulder pain but also help you relieve back pain as well. Here are a few simple steps to do it.
Kneel on a flat surface with your arm extended above your head.
Take a deep breath and slowly bend forward with sweeping your arms behind your back.
Try to move your chest as close to your thighs as possible.
Slowly, return to the initial position. Repeat the steps for 6-7 times.
6. Gomukhasana (Cow Face Pose)
Cow pose stretches the buttock muscles and opens up shoulders to help you relieve the shoulder pain.
Sit and place your both feet on the ground, bend your knees.
Bring your left foot underneath your right knee.
Stuck your right knee directly on top of the left.
Raise your right arm above your head and bend the left elbow to interlock the left arm at the back.
Breath and exhale.
Now release your arms, uncross your legs and back to the Dandasana.
Repeat the same steps with another leg.
7. Matsyasana (Fish Pose)
Matsyasana is known as a deeper chest and shoulder opening yoga pose. It is one of the best stretches for neck and shoulder pain relief and quick relaxation.
Lie on your back cross your legs in the padmasana and relax the whole body.
Inhale and press your arms and elbows to lift the chest slightly up.
Take your head back and lower the crown of the head to the floor.
Hold the big toes with your hands. Breath slowly and deeply.
Taking the support of elbows release the head and strengthen the legs.
8. Savasana (Corpse Pose)
Savasana is one of the easiest relaxing poses for a beginner, anyone can do it easily. This yoga asana provides deeper relaxation to your nervous system. It relaxes, calms and restores your whole body.
Lie on back, rest your arms along the side of your body while palm facing upwards. Extends your legs and keep them 3 to 4 feet apart from each other.
Turn your head into the right and left, then back to the center.
Close your eyes, breath slowly and deeply. Pause and hold the breath for a few seconds and then exhale slowly.
Bring your attention to the body, muscles and try to relax them.
Start from the muscle of toes and move towards to feet, legs, hips, lower back, and shoulders.
Then bring attention to your fingertips then move upward to armpits, chest, and belly.
Once you are ready to come out to the pose then slowly start to slowly bring some movement to your body.
9. Brahma mudra Asana
This one is also a simple pose that can give you instant relief in shoulder pain.
Sit comfortably with your legs crossed and a straight back.
Slowly, move your neck towards the right-hand side.
Hold it there for a few seconds.
Then, slowly move your neck towards the left-hand side.
You should repeat this procedure for at least 3-4 times.
You can simply add these poses in your daily exercise routine and lifestyle to get rid of the pain completely. These yoga stretches for neck and shoulder pain will help loosen tight and stiff muscles around the neck and shoulder.
However, you should take advice from a physician if the problem continues for an extended period of time.
What is it that makes them listen to you with rapt attention?
What is it that instills confidence in you?
It is the way you present yourself and, GOOD POSTURE is a part of it!
A good posture boosts your confidence and eliminates various problems like lethargy, lack of energy and bad mood.
Maintaining good posture is always necessary to avoid health problems too that slowly affect us over the years like a weak spine, neck and shoulder pain, gastrointestinal issues, etc.
Since childhood, we have been told that good posture is essential and should be maintained so all the time, but it is easier said than done.
Continually reminding yourself about it while sitting, standing, walking is not possible and this prolonged habit of staying in a relaxed state can have severe effects on our body especially women who suffer from diminishing bone density and weak bones as they age.
So what else you can do?
Is there any other way rather than staying alert about our posture the whole day?
Surprisingly, I found the answer where I least expected it – Yoga.
Yoga is the most powerful technique if you know how to take the proper steps to reach your full potential.
In this post, we have put together six easy spine straightening exercises to improve body posture. These spine straightening exercises are based on yoga poses and techniques.
Yoga can perfect your body posture. It has the ability to restore curved back and hunched shoulders which are the result of years of sitting in a bad posture.
So are you ready to build your posture and confidence with these 6 yoga inspired spine straightening exercises?
1) Cow face pose/ Goumukhasana
Cow face pose is a spine stretching exercise that is very flexible in the sense that it can be done both at home and in the workplace. Here are a few simple steps to do it.
Fold your legs on a mat or if you are sitting on a chair press your feet downwards.
Stretch your right hand above your head and fold it to touch your back.
Now while keeping the left hand downwards fold it to meet the right wrist or fingers ( whichever is possible) at the end.
Inhale and hold for 5 seconds.
Repeat the other way.
Repeat it till you feel the tension in the spine go away.
2) Tree pose/ Vrikshasana
An easy spine straightening exercise that not just correct your posture but also improve your long term health.
Stand straight. Hold your hands above the head and join the palms
Fold the right leg and place the foot on the left thigh as high as possible.
Stay for 5 seconds and repeat the other way.
Do it ten times, but be sure that you can balance well on one foot for a long time.
3) Bow pose/ Dhanurasana
It is a back stretching exercise that straightens your back by curving it! You may not have expected this. Lol!
Lie down straight.
Fold both legs and hold the ankles with the respective hand.
Arch your back as much as possible.
Inhale and stay for 25 seconds and exhale. Keep doing this each time you Arch your back.
Do 10-15 times.
4) Warrior pose/ Virabhadrasana
Warrior Pose will make you feel as if you are standing tall (pun intended).
Stand straight. Lift your hands above the head and join the palms.
Put your right leg forward and bend it at 90 degrees. Stretch left leg to the back and keep the knee straight.
Straighten yourself while pushing towards the upward position.
Stay like that while holding your breath and slowly exhale while changing position.
Do 15-20 times.
5) Bridge pose/ Sethu Bandha Sarvangasana
This spine strengthening exercise stretches the shoulders as well.
Lie straight on the back. Fold your legs with feet touching the ground. Supporting your body on the hands, lift your hips such that only hips and back are above the ground.
Adjust your shoulders blades under the back and stay for about 10 seconds in this position.
Do it 5 times.
6) Mountain pose/ Tadasana
Tadasana is a relaxed pose as compared to the above yoga poses, but I have kept it at last since doing it in the correct way matters a lot.
Stand straight inattention.
Legs should be a foot apart.
Stay for a while. Don’t t relax even when you feel like tension build up in the back.
Doing yoga to improve body posture can eliminate health problems, and you will get so used to it such that you will unconsciously start maintaining good posture which exudes confidence.
Lower back pain has become a common complaint among millennials especially women. The cause of this problem is not unfamiliar.
Almost everyone from kids to adults is addicted to some form of technology or other that demands continuous sitting or standing posture with little to no scope of physical activity.
Most of the career choices require us to sit for a longer time.
Women have it worse. They have this pressure of work-home balance where everything has to be perfect and done at the right time.
On top of it, In women, bone density decreases with age. These are the leading causes of lower back pain in women.
But we can’t do our best when we have a constant nagging pain in the back.
So what is the solution?
What can be done that demands no investment and is less time-consuming?
Something that has been known since ages and is the most natural remedy without any side effect that relieves us of both mental and physical troubles- YOGA.
Here in this post, we have put together 7 best yoga-based stretches for lower back pain relief and strengthen your core.
Please click the save button to read it anytime! 🙂
These yoga poses to stretch out your tight muscles to provide more strength and more flexibility.
So let’s rock the mat?
1) Child Pose/ Balasana
This has been named so after the way infants struggle to crawl.
Position yourself on your hands and knees.
Inhale while bending your knees so that the hips touch the heels.
Outstretch your arms and exhale while bending forward and touching the ground.
It elongates and the back and gives relief from stress.
2) Cat and Cow Pose/ Marjariasana
The cat and cow pose is an easy physical exercise for lower back pain. This yoga pose stretches your spine and hips to relieves tension in the lower back.
Position yourself on hands and knees, shoulders over wrists and hips above knees.
Inhale slowly and lift up your head and tailbone, arch your back and look towards the ceiling. Stay for a few seconds.
Now slowly exhale and make your back round and drop your head down while relaxing the shoulders.
Do 10 rounds or for 2 minutes.
3) Standing Forward Bend/ Uttanasana
It is the most common exercise usually find in the physical education classes in schools. It stretches the calf muscles and the spine.
Stand straight stretch your hands above your head and inhale.
Slowly exhale while bending down and bring down the hands to touch your feet.
Stay for 20 seconds in this position and go back up slowly.
Repeat for 10-15 times. Don’t overdo it since the calf muscles will pain a bit if you are not used to this exercise.
4) Supine Spinal Twist/ Supta Matsyendrasana
It relieves tension in the neck and back.
Lay on your back and stretch your arms in a T position.
Bend your knees towards your chest.
Now slowly bend the legs to the right side.
Repeat this in the left direction.
Do 10 rounds both ways. Stay for about 10-15 seconds before switching positions.
5) Cobra Pose/ Bhujangasana
This is the best and the easiest physical exercise for lower back pain.
Lay on your stomach.
Put both your elbows under your shoulders and palms facing downwards.
Stay in this pose for a whole minute and breathe normally.
In this pose, the whole body up till the waist above the ground and rest of the body touches the ground. You can actually feel a relaxing sensation in your lower back.
6) Downward Facing Dog/ Adho Mukha Svanasana
It is a bit similar to standing forward bend but is favored more. It stretches both hamstring and spine.
Stand straight and while inhaling bend down on your knees.
While exhaling move your hips upward and straighten the knees. The back is arched and the head is between the shoulder blades.
Stay in this position for 15 seconds and while inhaling return back to normal position.
Do it for 5-10 times in a span of 20 seconds.
7) Triangular pose / Trikonasana
It stretches the back, hamstrings and calf muscles.
Stand straight. Stretch the legs sideways.
Stretch hands straight in T position.
Bend to the left side such that the T position remains undisturbed and the left palm touches left ankle.
Repeat the same way to the right side.
Do it 10-15 times.
All these poses are very beneficial yoga poses for lower back pain (Supine twist and downward-facing dog are the best physical exercise for lower back pain in women over 30).
Do them in moderation if are new to yoga. Always warm-up.
Stretches for lower back pain involve stretching some specific muscles so it’s important to work them up a bit before the actual yoga so that they won’t become stiff and cause pain later.
Be consistent to see the results and remember “Healthy body equals healthy mind”!
In modern society, stress is something we can’t escape from. We’ve all experience stress and anxiety in some aspects of our life.
And yoga can be your powerful stress management tool to deal with your hard time properly.
Further, in this post, you will get 7 different yoga poses that will work perfectly both for the beginners and those who are experienced in fulfilling yoga for anxiety and yoga for stress relief.
Yoga is a great way to work on your balance, flexibility, and strength. But it’s not just limited to physical benefits.
A growing number of studies suggest practicing yoga can help you relieve anxiety and stress to boost mental health.
Yoga also functions as a self-soothing technique to enhance your mood and overall sense of well-being. This technique produces an atmosphere where you find yourself in comfort and calm.
Please click the save button to read it anytime! 🙂
These 7 yoga poses target to achieve inner calmness, peace, and relaxation for your proper stress management. So are you ready to give yoga a try? All you need to take a deep breath and enjoy these awesome yoga poses at the comfort of your home.
1. Child’s pose (Balasana)
The name is highly related to the behaviors that children have but has a lot of benefits for the adults. You get started when seated on your ship and with your knees separated.
With your torso resting on your thighs move your hands forward. To get the best out of the pose, remain in the same position with your neck, hips, jaws, and shoulders relaxed.
2. Cobra pose (Bhujangasana)
The pose will require you to have your toes unstacked, your legs perfectly extended straight behind you and your belly in the horizontal support.
You then hold and press down using your palm which as position right next to the ribs and keeps your chest extended forward while keeping your neck longer.
After doing this for fifteen minutes, the process can be repeated two or three times at intervals.
3. Tree Pose (Vrksasana)
The pose requires you to balance your body in one leg for a few seconds. You can start by positioning either of the foot to rest on the other thigh where one leg supports the body strongly.
While balancing on one leg, your palms should be together and rest them on the chest to give you a pose like a straight tree.
4. Bridge Pose (Setu Bandha Sarvangasana)
To achieve the pose, you will start with your back straight on the ground.
Raise your hips slightly and hold your hands together on the lower part. With your head and the foot on the straight horizontal position raise your hips using the support of the chest and the folding legs to put your knees on the highest position.
Maintain the position for 15 seconds and then repeat the process making sure you are able to breathe and relax with ease.
5. Happy baby pose (Ananda Balasana)
You will get started with your body kept in a horizontal position and supported by your back.
Raise your feet for your hands to grab the inner part of the feet. With your hands kept straight, try to fold the legs to support the elbow using the knee.
6. Corpse pose (Savasana)
Keep your body horizontally on the back with both hands and legs kept apart.
Close both eyes and keep your body relaxed. Keep the whole body in the same position for a few seconds and make sure that the whole body is fully relaxed.
7. Downward dog pose (Adho mukha svanasana)
You will form almost an inverted V-shape with your waist taking the highest position. Both the palms and the foot will support the body by firmly holding the ground.
The physical benefits of yoga are well known but mental benefits are also important as well.
Maintaining a daily yoga practice is a great way to get the most out of yoga in terms of both mental and physical benefits. Most of the outcome from yoga comes with long term positive effects and enhances the productivity of the body.
Yoga is one of the most popular and effective types of physical exercise.
This is because it does not only work on your body, but also on your mind and spirit.
Yoga is extremely beneficial for your overall physical and mental health.
From increased strength to flexibility, maintaining a balanced metabolism to weight loss or improved energy and vitality, there are several different reasons you may want to try yoga.
Fortunately, you don’t have to be a pro to reap all the benefits of yoga, a newbie can easily get benefits of yoga.
Practiced every day, yoga can bring significant improvements to your life from every point of view, and it is easier than you think even for beginners.
In this post, we have put together a perfect 15-minute yoga routine for beginners that incorporates some of the best yoga poses that focus on developing balance, strength, and flexibility.
So are you ready to kickstart your yoga journey?
Please click the save button to read it anytime! 🙂
This yoga beginner routine will incorporate basic postures, controlled breathing, and relaxation. Just breathe and connect with your body.
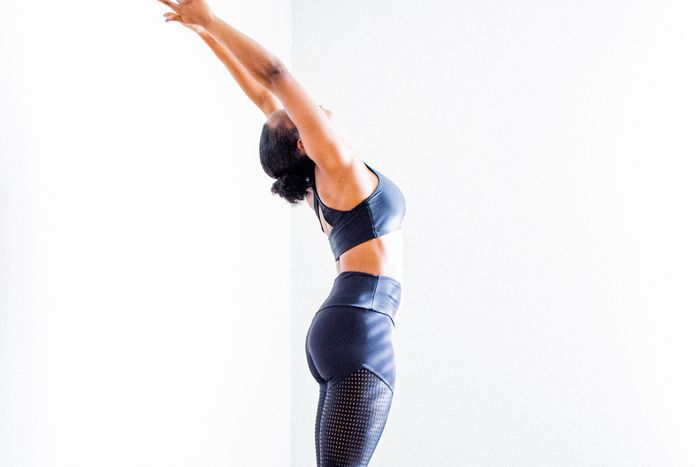
1. Mountain Pose (Tadasana)
This is the first pose for your routine, and it is simple yet important.
All you have to do is to stand straight, with all your toes touching the floor, your arms on the sides of your body.
Maintain this position for 2 minutes, and wake up your muscles during this time.
Focus on your toes, feel each one of them, then go up to your legs, your waist, your shoulders, and your face. Visualize your body relaxing from your toes to the top of your head.
2. Downward Facing Dog ( Adho mukha svanasana )
Yet another simple position, this pose will allow you to stretch, strengthen and relax your muscles while releasing any potential pressure points on your back.
Stand straight, then bend forward until your palms touch the ground.
Maintain your weight on your palms and feet; bring them close together, which means your butt will be significantly higher than the rest of your body.
Maintain this position for 3 minutes, and breathe deeply while staying in this pose.
3. Plank Pose (Phalakasana)
You are already on your Yoga mattress. Once you are done with the previous position, lower your butt and move your palms away from your feet, until your body is a straight line.
Support your weight in your palms and the tip of your toes. This exercise is excellent for your leg and core, and it is enough to maintain this pose for 2 minutes.
4. The Child’s Pose
Sit on your knees on the Yoga mattress. Lean forward with your hands straight, put your palms on the ground.
You should support your weight on your palms and the chin of your legs. This is a resting pose excellent for people who have back pain or spend a lot of time standing throughout the day. Maintain this pose for 2 minutes.
5. The Tree (Vriksasana)
This exercise will improve your balance and stability, and bring you peace of mind.
Get back up, stand straight. Bring your palms together in front of your chest; raise your left leg and support it on your right inner thigh.
Maintain this position for 3 minutes; breathe deeply, and maintain every breath for 2 seconds before exhaling.
6. Seated Forward Bend (Paschimottanasana)
This is an excellent exercise to end your routine, as it will help you relax and stretch. Sit down on your Yoga mattress, extend your legs.
Put your palms on the floor, next to your feet; bend forward as much as you can, until your abdomen touches your knees. Maintain this pose for 3 minutes.
Be sure you are regular in your yoga practice. This routine won’t take much of your time, but it will help you get to know the benefits of Yoga.
Try to practice yoga daily, you can complete it at any moment of the day to enjoy numerous health and mental benefits.